Updating a legacy system can feel like unraveling a complex knot, especially when the changes impact several parts of the app. This is a challenge I face often, and I’ve been on a quest to find a strategy that works consistently for me.
I’ve managed to develop a process that I now rely on:
- Understand the problem’s structure
- Initiate with tracing bullets – Make it work somehow
- Develop a more refined solution
- Refactor again for optimization
Let’s dive into these steps using my work on the PICABOO image editing app as an example.
Recently, I had to overhaul how we handle default settings for each filter. We shifted from a single default setting for all filters to a system where the backend allows custom overrides for each and every filter as needed. For example, adding a grain effect by default only for filters mimicking old cameras.
Now, let’s break down how we tackled this:
1. Understand the problem’s structure
Grasping the scope of the problem early is tough for me. I tend to get stuck planning and theorizing, which slows down the actual work. I’ve learned to jump in sooner rather than later, balancing a thorough understanding with forward motion.
First, we identify all the components that the change will touch. At this point, it’s about getting a bird’s-eye view of the system as it stands. What’s the starting point for our changes? Do they affect other modules? Maybe there’s something we can reuse? I like to jot down any initial thoughts or TODOs in the code comments.
In the case of PICABOO
For PICABOO, I mapped out where the filter settings were integrated within the system and how they’d shift with user interactions. Here’s what that looked like:
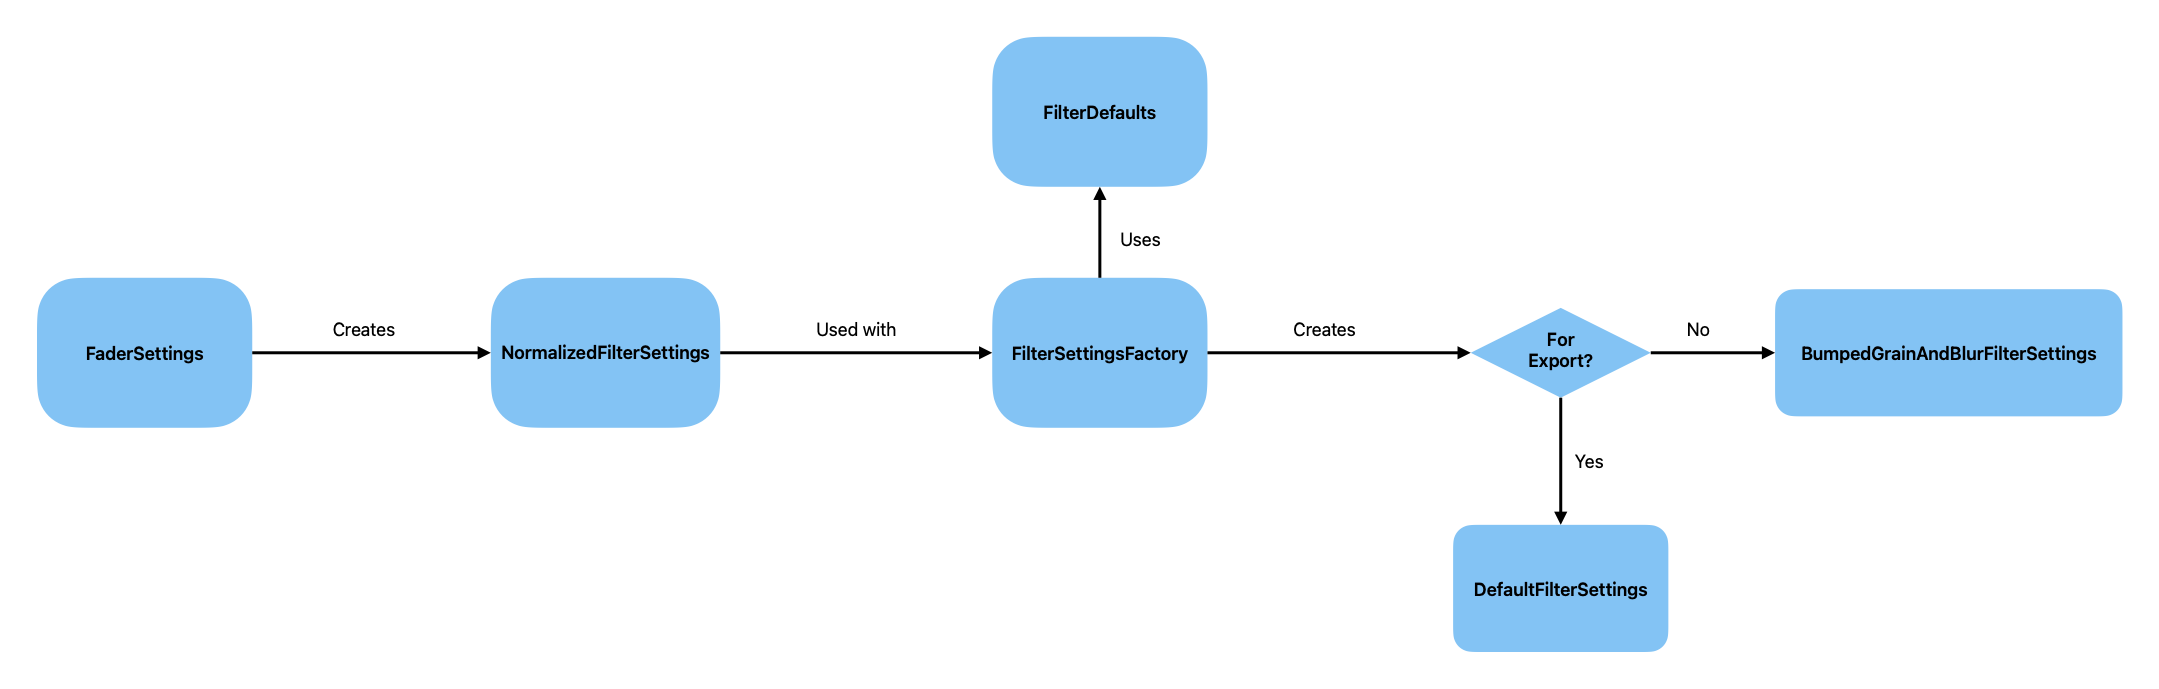
As illustrated, the FaderSettings establish the foundational tone for the workflow. After conversion to NormalizedFilterSettings, these settings, in conjunction with FilterDefaults, generate the FilterSettings employed for displaying and exporting the edited image in the app.
By the way I failed here on my first go by just skipping it. I thought I knew the codebase inside out. It turns out, I didn’t. I lost an hour fixing mistakes from my assumptions—the fader settings, not the normalized settings, were the key players here.
2. Initiate with tracing bullets – Make it functional
Inspired by the Pragmatic Programmer Book, I learned to start with a rough, quick version. It’s not about perfection here—it’s about seeing the structure in action.
In the case of PICABOO
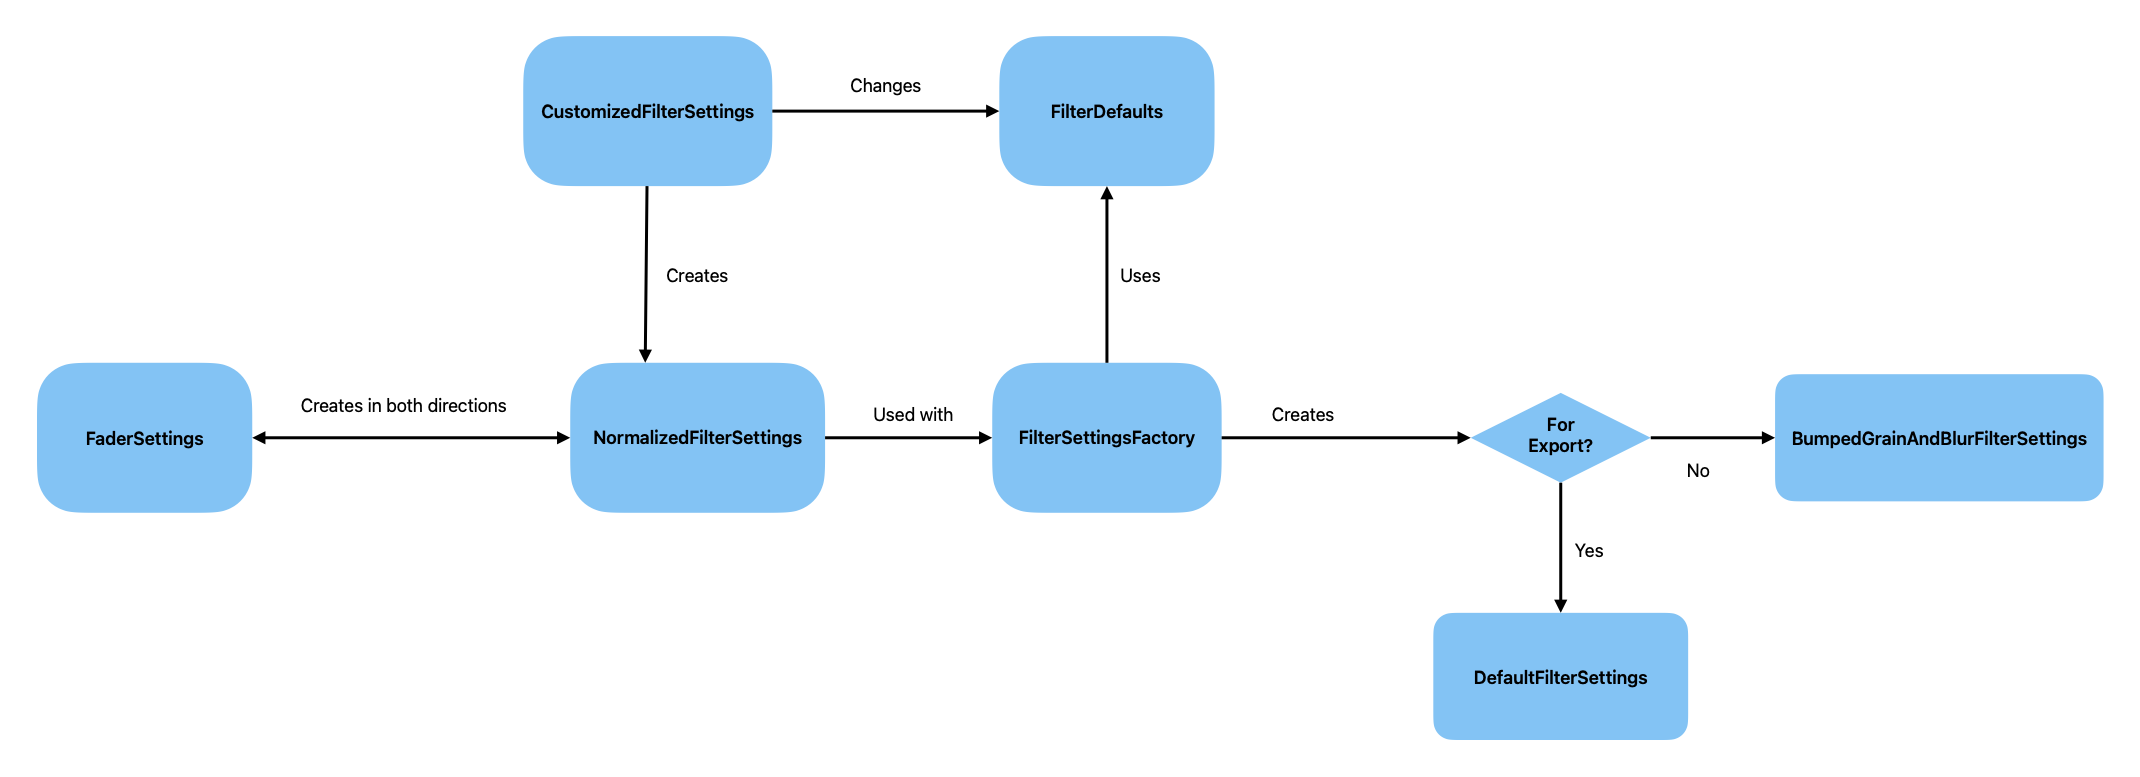
So it seems like there’s much more going on now, and indeed there is. After grasping the initial setup of the filter settings, I integrated the CustomizedFilterSettings directly into the creation process of the filter settings. Consequently, the FaderSettings couldn’t solely dictate the workflow anymore; the relationship had to be bidirectional. FaderSettings would generate NormalizedFilterSettings and vice versa. This required a fair amount of rapid and rough coding—establishing mock backend data, tweaking settings, and yes, things got pretty chaotic at times.
3. Develop a more refined solution
Now, resist the urge to just patch the initial draft. It’s time to step back, reassess the foundational structure, and redesign the solution from a clearer perspective. I often grab a pen and paper at this stage to sketch out my thoughts and redraw an optimized architecture. As your solution should be pretty close to the it’s final form after this step, don’t forget to add your unit tests in this step. This way you don’t get bogged down in an architecture that is not testable. It also makes the last step easier, in which you refactor your solution further.
In the case of PICABOO
This led to a complete rewrite of how settings were managed, resulting in a much cleaner system.
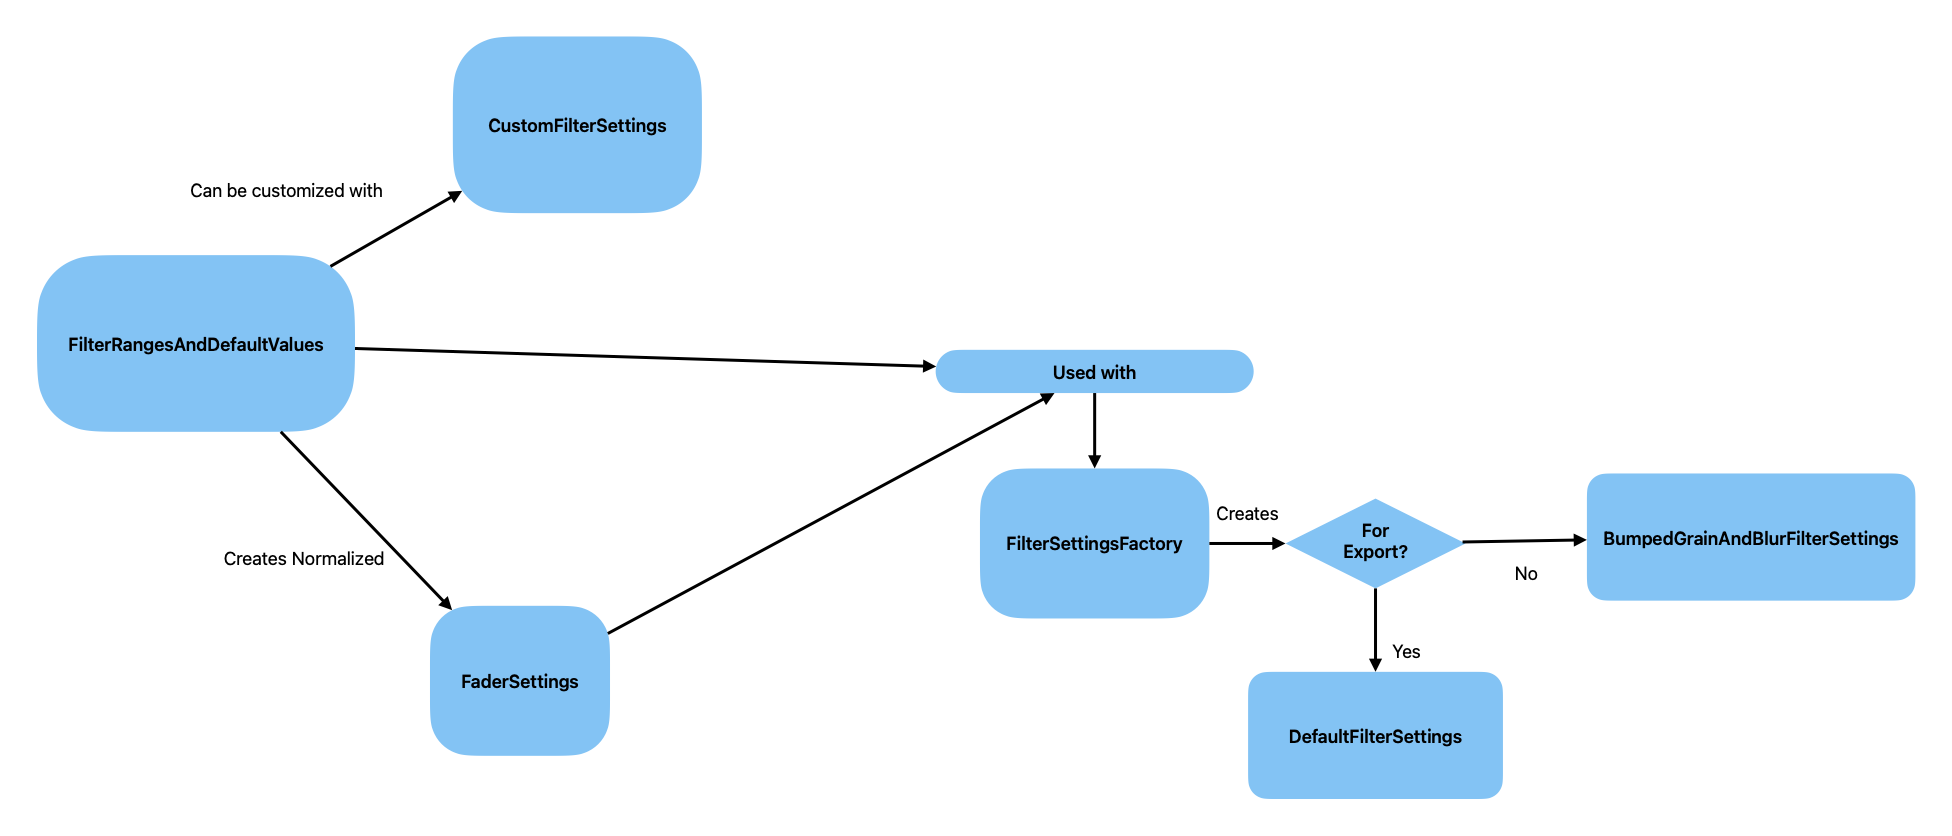
Once again, we have a unified starting point, the FilterRangesAndDefaultValues, which can be tailored using the CustomizedFilterSettings for a specific filter. From here, we generate the filter settings for both exported and displayed images by combining the customized FilterRangesAndDefaultValues with the current FaderSettings. Although this might not seem significantly different from the previous method, it greatly simplifies the addition and modification of filter settings. Essentially, everything originates from the FilterRangesAndDefaultValues, and any changes here trigger compiler errors that help navigate through the entire architecture when necessary. In my view, this strategy is not just a necessary adaptation for integrating custom settings per filter but also an enhancement of the filter settings overall.
4. Refactor again for optimization
After refining, I create a draft PR to make it easier to review all modifications compared to the base branch. This step allows tweaking, optimizing, and streamlining before finalizing. Add a couple more tests and you are done!
Final note
This personalized approach has made a huge difference for me. However, remember that once you’ve opened that PR, the review process begins. Embrace feedback, discuss openly, and refine further. Don’t be too narcissistic when it comes to your code. Take other people’s feedback into account, but don’t be afraid to disagree if you can rely on actual facts rather than feelings.